Incorporating nutrient-dense vegetables like Swiss chard into your diet requires careful preparation to ensure optimal digestibility and safety during your recovery journey. This article provides evidence-based techniques for learning how to cook chard, helping you understand how to safely soften fibres and reduce compounds that may challenge your sensitive digestive system. By following these professional guidelines, you will learn how to prepare this versatile leaf as a reliable, gentle, and nourishing addition to your post-transplant nutrition plan.
The most effective way to address how to cook chard for digestive health is to separate the fibrous stems from the leaves, sautéing the stems first until softened before wilting the leaves in a pan with a splash of water and olive oil. This two-stage cooking method ensures that the tougher parts of the vegetable reach a tender consistency, which significantly reduces the mechanical effort required by your digestive tract to break down the food. Ever wondered if your favourite greens fit into your current recovery plan? It’s all about the texture.
How to cook chard
Selecting and Preparing High-Quality Chard
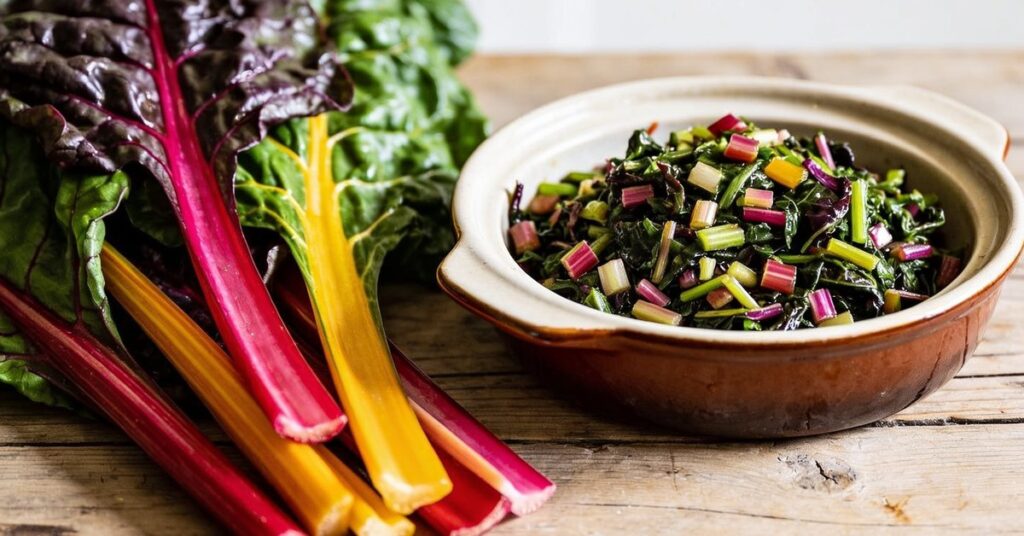
When selecting Swiss chard at the supermarket, identify bunches with vibrant, fresh green leaves that are free from any brown discolouration. Whilst rainbow chard is well-regarded for its distinctive, colourful stems, standard varieties are equally delicious. Ensure the stems are firm and the leaves appear hearty.
Before beginning your culinary preparation, ensure you wash your hands thoroughly with warm water to prevent the spread of bacteria. Prepare the chard by following these simple steps:
- Clean: Rinse both leaves and stems meticulously under cold running water to eliminate any grit, dirt, or stray insects.
- Separate: Carefully detach the colourful or white stems from the soft, leafy sections.
- Chop: Slice the firm stems into uniform pieces approximately 1/4-inch thick. Use a knife to roughly chop or shred the leaves into manageable portions.
The Sautéing Method
Sautéing is considered the most effective way to prepare chard, yielding a tender result that works perfectly as a nutritious side dish or an ingredient in soups.
Follow this straightforward cooking process:
- Heat: Warm one tablespoon of olive oil in a large frying pan or skillet over a medium heat setting.
- Sauté Stems: Add the prepared stem pieces to the pan first. Cook for approximately 3 to 4 minutes or until they begin to soften.
- Aromatics: Incorporate a pinch of sliced garlic and sauté for 30 to 60 seconds until the aroma is released.
- Cook Leaves: Add the chopped greens to the skillet along with a seasoning of salt and black pepper.
- Wilt: Stir the mixture continuously for 2 to 3 minutes until the leaves have fully wilted and reached a tender consistency.
- Serve: Remove the pan from the heat and finish the dish with a squeeze of fresh lemon juice before serving.
Essential Preparation and Cleaning Techniques for Swiss Chard
Proper preparation begins with a thorough cleaning process to remove any grit or soil that could cause irritation to a sensitive gut, followed by precise cutting to manage the fibrous texture of the plant. Submerge the chard in a basin of cold water, gently agitating the leaves to ensure all trapped sediment is washed away before you begin the culinary process.
- Fill a large bowl with cool, clean water.
- Submerge the bunch and swish it around to dislodge any hidden grit.
- Remove the stems from the leafy greens; they are two different beasts when it comes to digestion.
- Stack leaves and slice into 2-inch ribbons for easier chewing.
- Dice stems to a uniform 1/4-inch size to ensure consistent softening.
Why Cooking Chard is Preferable for Digestive Comfort
Cooking Swiss chard is essential for patients with complex gastrointestinal conditions because heat application breaks down tough cellulose and reduces natural plant compounds that might otherwise be difficult to absorb. Post-transplant recovery is a journey, and managing your nutrition is a huge step toward getting back to normal life; keeping an eye on your fiber intake is a great way to monitor your progress.
| Nutrient | Value (per cup, boiled/drained) |
|---|---|
| Calories | 35 |
| Protein | 3.2g |
| Carbohydrates | 7.2g |
| Fiber | 3.6g |
Beyond macronutrients, the primary benefit of heating this vegetable is that cooking Swiss chard effectively reduces its oxalic acid content. For those recovering from surgery or managing intestinal failure, this reduction is a critical step in making the vegetable safer and more tolerable.
Best Methods for Sautéed Swiss Chard and Rainbow Chard
The best way to prepare sautéed Swiss chard or delicate rainbow chard is to heat 1 to 2 tablespoons of olive oil in a skillet over medium heat, cooking the chopped stems for 3 to 5 minutes before adding the leaves for an additional 2 to 3 minutes until they are wilted and dark green. Adding a splash of water to the pan during this process helps to steam the vegetables slightly, ensuring they reach a tender texture without burning.
Important: Always monitor your own tolerance levels, as every graft function is unique; if you feel discomfort, steam your vegetables for an extra minute to ensure they are as tender as possible.
Culinary Tips for Chard with Garlic and Lemon
You can neutralise the natural bitterness of chard and rainbow chard by blanching the greens in salted boiling water for 3 minutes before proceeding with your main cooking method. This simple step helps to leach out the compounds responsible for the sharp, bitter notes, making the vegetable side dishes significantly more palatable for those who have developed taste sensitivities during their medical treatment.
- Utilise healthy fats like olive oil to coat the fibres.
- Add sweet aromatics like onions or roasted garlic.
- Finish with a squeeze of fresh lemon to brighten the flavour.
- Consider a light dusting of parmesan if your current diet allows for dairy.
Simple Swiss Chard Recipe and Vegetable Side Dishes
A classic and reliable Swiss chard recipe is to sauté 1 bunch of chard with 1 tablespoon of olive oil and 2 sliced garlic cloves, adding 1 cup of canned cannellini beans or chickpeas to create a more substantial, protein-rich meal. This combination provides a gentle, nutrient-dense option that is easy to prepare without complicated equipment or extensive time in the kitchen. Learning how to cook chard in this manner allows you to control the exact level of tenderness in every bite.
In my experience, keeping the seasoning simple with just a pinch of salt and pepper prevents over-stimulating a sensitive gut, while the beans provide a great energy boost for those long recovery days.
Preserving Swiss Chard for Future Use
Blanching is the most effective way to store chard for later use, allowing you to keep the vegetable in the freezer for 10 to 12 months without losing significant nutritional value. To do this, boil 4 quarts of water—using 1 pound of leaves per batch—and blanch the leaves for 60 seconds or the stems for 3 minutes.
Immediately after the boiling time is up, submerge the blanched chard in a bowl of ice water to stop the cooking process instantly. Once the vegetables are completely chilled, drain them thoroughly and package them for the freezer; this method ensures that you have a ready-to-use, pre-softened nutritional resource available whenever you need to prepare a quick, safe meal during your recovery.
Frequently Asked Questions
Is it better to eat chard raw or cooked?
Cooking is generally recommended for patients with digestive sensitivities, as it reduces oxalic acid and softens the plant fibres. This makes it significantly easier for the gut to process nutrients compared to consuming raw greens.
How long should I cook the garlic?
When adding minced or thinly sliced garlic to your skillet, cook it for only 30 to 60 seconds until fragrant. This prevents the garlic from burning, which preserves the delicate flavour balance of your chard with garlic dish.
Can I use rainbow chard instead of standard Swiss chard?
Yes, rainbow chard can be used interchangeably with standard Swiss chard in any recipe. The cooking times remain the same, though the coloured stems may require slightly more attention to ensure they reach the desired softness.
What is the benefit of adding lemon juice at the end?
Adding fresh lemon juice at the end of the cooking process provides a bright, acidic contrast that cuts through the earthy flavour of the greens. It also helps to enhance the overall taste of your vegetable side dish without the need for excess salt.
Prioritising the separation and sufficient softening of stems during your cooking routine will drastically improve the ease with which your digestive system processes these nutrient-rich greens. Treating your gut with this level of care is a vital step in enjoying a diverse, nourishing diet as you continue your journey toward recovery.