For those navigating the complexities of post-transplant recovery or chronic digestive conditions, mastering the preparation of nutrient-dense vegetables like spring greens is a vital step toward reclaiming both dietary confidence and gut comfort. This guide provides clinically informed, practical techniques for cleaning, cooking, and storing these greens to ensure they are gentle on your digestive system while maximising their nutritional benefit. You will learn exactly how to transform this versatile vegetable into a safe, easily digestible side dish, providing you with the clarity needed to manage your daily nutrition with ease.
To understand how to cook spring greens effectively for a sensitive digestive system, you must prioritise fine shredding and thorough softening through steaming or blanching, which reduces the mechanical load on your gut. The primary goal is to break down the fibrous structure of the leaves, making the vital nutrients—such as folate, vitamin K, and iron—more bioavailable and less likely to cause irritation or blockages. By removing the tough central stalks and using gentle heat, you transform a potentially challenging raw vegetable into a highly tolerable, nutrient-packed component of your recovery diet.
How to cook spring greens
Understanding Spring Greens
Spring greens represent the initial harvest of young, loose-leaf cabbages each year. Unlike denser varieties, they lack a hard core, resulting in a delicate and vibrant vegetable that requires minimal cooking time. Due to their tender nature, they are ideal for quick preparations that preserve their fresh flavour and nutritional value.
Essential Preparation Tips
Proper preparation is crucial to ensure a pleasant texture. Start by thoroughly washing the leaves to remove any grit or soil. It is recommended to discard the tough central stalks, then slice the remaining leaves into thin ribbons. This technique ensures an even cook and a silky, melt-in-the-mouth consistency.
Cooking Methods
- Boiling and Blanching: Fill a large saucepan with water, add a pinch of salt, and bring to a rolling boil. Submerge the prepared greens for three to four minutes until they have wilted but remain bright green. Drain thoroughly before tossing with high-quality butter, sea salt, and freshly cracked black pepper.
- Steaming: This gentle approach highlights the natural, earthy sweetness of the greens. It is a superb method not only for spring greens but also for related vegetables such as kale, chard, or spinach.
- Sautéing: For a glossy, vibrant finish, sautéing is an excellent choice. This method creates a sophisticated side dish that pairs exceptionally well with roasted meats or flaky white fish.
- Braising: If you desire a deeper flavour profile, consider braising the greens in a savoury stock with aromatic garlic and butter. This single-pan method is perfect for a quick, flavour-packed accompaniment.
Expert Recommendations
To produce a richer flavour, you might wish to fry some chopped bacon in a high-sided pan before adding the greens. Cooking the cabbage directly in the rendered fat and a small amount of liquid will result in a more decadent dish. Remember that, regardless of the method chosen, spring greens cook very swiftly; keeping a close watch on the pan will prevent them from losing their characteristic bright colour and soft, silky texture.
Frequently Asked Questions
- What is the most effective approach? The most reliable method to allow the fresh, natural flavour of spring greens to shine is either rapid blanching in boiling water or steaming.
- Are they suitable for quick meals? Absolutely. Because they are thin and tender, they are ready to serve in less than ten minutes, making them a perfect addition for busy midweek dinners.
Essential Preparation Techniques for a Spring Greens Recipe
Preparing spring greens for a compromised digestive tract requires meticulous cleaning and precise mechanical breakdown to ensure safety and comfort. Because raw greens can harbour soil-borne bacteria that may be hazardous to those on immunosuppression, the washing process must be rigorous and systematic.
Cleaning and Shredding for Palatability
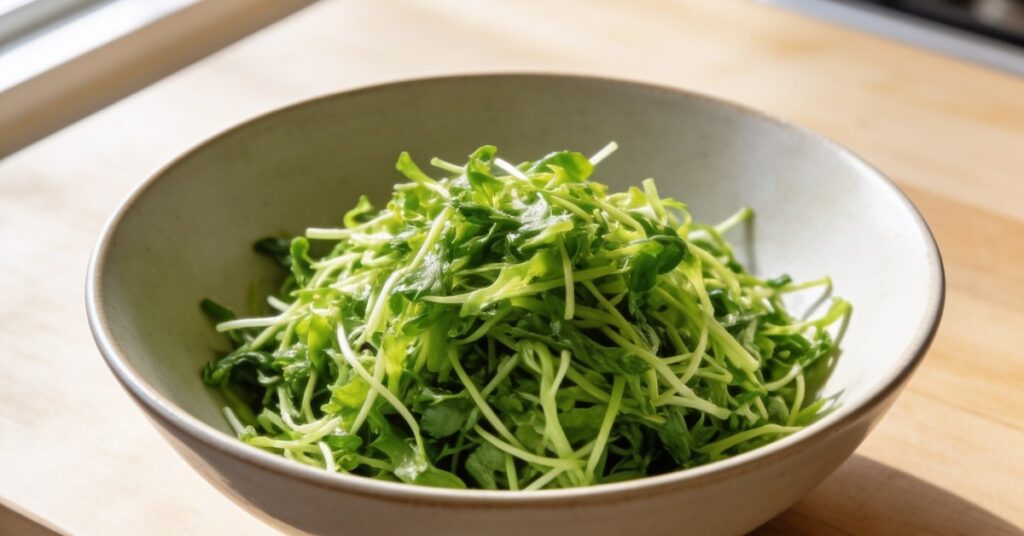
The safest way to clean your greens is to soak the leaves in salt water for 30 minutes, followed by a 3-minute rinse under running water, and a final 10-minute soak in cold water. When you finish washing, always lift the greens out of the water basin with your hands or a slotted spoon rather than draining the plug, as this ensures any sediment or grit remains at the bottom of the sink. After cleaning, use a salad spinner to remove excess water, as moisture can affect the final texture. To make the greens easier to process, remove the fibrous center stalk from the middle of each leaf, then stack the leaves, roll them tightly, and slice them crosswise into thin, fine shreds.
Optimal Ways to Cook Spring Greens and Cabbage
The most effective way to cook spring greens while maintaining digestive tolerance is to use moist heat methods that soften the cellulose without stripping away all the essential vitamins. For patients recovering from intestinal failure or transplantation, soft, cooked textures are significantly safer than raw or crunchy preparations, as they minimise the risk of transit issues.
Steaming and Boiling for Gentleness
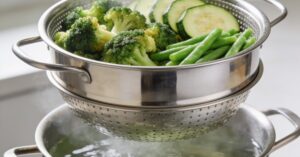
Steaming is the superior method for preserving nutrients, achieved by setting a steamer basket over a pan of boiling water and cooking for 6 to 8 minutes with a tight-fitting lid. If you prefer to steam in a pot, use 1/2 cup of filtered water and ensure you let the greens sit for 1 minute after removing them from the heat to allow excess moisture to steam off. Alternatively, if you choose to boil, do so for 3 to 4 minutes in a pot with enough water to cover the greens, adding a generous pinch of salt. Always cook uncovered to keep the colour bright, then drain immediately into a colander or sieve, shaking off all excess water to prevent a soggy, unpalatable result.
Sautéing and Stir-Frying for a Vegetable Side Dish
Sautéing and stir-frying provide a flavourful way to incorporate greens, provided you blanch them in boiling water for 2 minutes first to soften the fibres. For a sautéed dish, heat 2 tablespoons of olive oil or butter in a large pan over medium heat, add 2 minced garlic cloves, and cook for 1 minute until fragrant before adding your greens cut into 1cm ribbons. Toss the greens to coat them, add 2 to 3 tablespoons of water or stock, cover with a lid, and cook for 3 to 5 minutes. If stir-frying, use 200g of greens and a tablespoon of oil in a wok over high heat, stir-frying for 2 to 3 minutes; adding a splash of water and covering for 1 to 2 minutes at the end ensures a softer, more manageable texture for your gut.
Enhancing Nutritional Value and Flavour with Top Tips
You can significantly enhance the flavour and nutritional profile of your spring greens by using high-quality fats and aromatic additions that stimulate the appetite without overwhelming the digestive system. Post-transplant recovery is a journey, and managing your nutrition is a huge step toward getting back to normal life; consider this table as a quick reference for your flavour combinations:
| Method | Best Fat Source | Recommended Seasoning |
|---|---|---|
| Steaming | Unsalted Butter | Salt & Black Pepper |
| Sautéing | Olive Oil | Minced Garlic & Ginger |
| Stir-Frying | Sesame or Vegetable Oil | Soy Sauce & Lemon Juice |
To maximise flavour, consider using chicken or vegetable stock instead of plain water during the cooking process to infuse the leaves with minerals. Toss the finished greens with 25g/1oz of unsalted butter, double cream, or extra virgin olive oil per serving to ensure adequate energy density. You can further enhance the dish by sautéing minced garlic, ginger, toasted cumin, or mustard seeds, or by mixing in caraway seeds. Finish the greens with a splash of fresh lemon juice, soy sauce, or chili flakes to your preference, and consider adding toppings like grated parmesan, crispy bacon bits, or toasted pine nuts for added variety and texture.
Proper Storage for Leftover Spring Greens
Maintaining high standards of food hygiene is essential for anyone managing intestinal health, particularly when storing produce that has been handled or prepared. Proper storage prevents the growth of harmful bacteria and preserves the quality of your ingredients, ensuring they remain safe for consumption throughout the week.
Remember: Do not wash raw greens until immediately before you intend to cook them, as excess moisture in the fridge is a fast track to spoilage.
- Store raw, unwashed greens in an airtight container or breathable bag.
- Keep them in the fridge for 3 to 5 days.
- Always remove any yellow, bruised, or mushy leaves before storing.
- Refrigerate cooked greens within 2 hours of serving to maintain safety.
Frequently Asked Questions
Is it safe for a transplant recipient to eat spring greens?
Spring greens are generally safe and highly nutritious for transplant recipients, provided they are thoroughly washed to remove soil-borne pathogens and cooked until soft to ensure easy digestion. Always listen to your body and consult your transplant dietitian regarding your specific dietary tolerances, especially if you have had recent surgery or are prone to bowel obstructions.
What is a good substitution for butter in a buttered spring greens recipe?
You can substitute butter with a high-quality extra virgin olive oil or a small amount of avocado oil to maintain healthy fat intake while keeping the dish moist. If you are strictly monitoring your fat intake, a splash of vegetable stock or a little lemon juice can provide enough moisture and flavour to keep the greens palatable without added fats.
How can I tell if my stored greens are still safe to eat?
If you notice raw greens have become mushy, slimy, or have developed a strong, unpleasant odour, you should discard them immediately. For cooked leftovers, if they have been refrigerated for more than 4 days, dispose of them to avoid the risk of foodborne illness, as immune-compromised individuals must be particularly cautious with food shelf-life.
How should I track my tolerance to new foods?
Start by introducing a very small portion of finely shredded, well-cooked greens into your meal and monitor your body’s reaction over the next 24 hours. Keep a simple food diary to note any changes in your bowel habits or comfort, and consult your transplant coordinator if you notice persistent bloating or discomfort.
Mastering the art of finely shredding and thoroughly softening your greens turns a challenging vegetable into a gentle, nutrient-rich ally for your healing gut. By prioritising these simple preparation steps, you can confidently enjoy a flavourful side dish that supports your recovery without compromising your digestive comfort.